
Epicanthoplasty + Lateral canthoplasty + Lower Canthoplasty
from 390,000 KRW* VAT Not Included
This procedure adjusts the inner, outer, and lower corners of the eyes to increase their horizontal and vertical dimensions. Depending on the eye shape, medial epicanthoplasty to reposition the epicanthal fold, lateral canthoplasty to open the outer corner of the eye, and lower canthoplasty to lower the eye corner through a conjunctival incision may be performed individually or in combination.
Surgery Overview
Epicanthoplasty is a procedure that adjusts the inner, outer, and lower corners of the eyes to increase their horizontal and vertical dimensions. Depending on the eye shape, Epicanthoplasty to reposition the epicanthal fold, Lateral canthoplasty to open the outer eye corner, and Lower Canthoplasty to lower the eye corner through a conjunctival incision may be performed individually or in combination.

Before-and-after photos (left: before surgery · right: after surgery) Before surgery → After surgery
Recommended for
· Those whose eyes appear small despite having double eyelids · Those whose upturned eye corners create a harsh appearance · Those whose eyes appear closed-off even with makeup
Epicanthoplasty
The longer the epicanthal fold at the inner corner of the eye, the smaller and more closed-off the eyes may appear. Epicanthoplasty is a procedure that repositions or removes the epicanthal fold at the inner eye corner to make the eyes appear much larger and more vibrant.
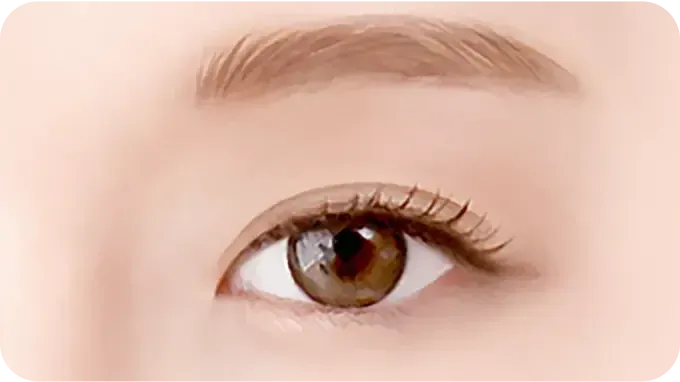
STEP 1. Before surgery
Double eyelids are present, but the eyes appear closed-off and heavy.
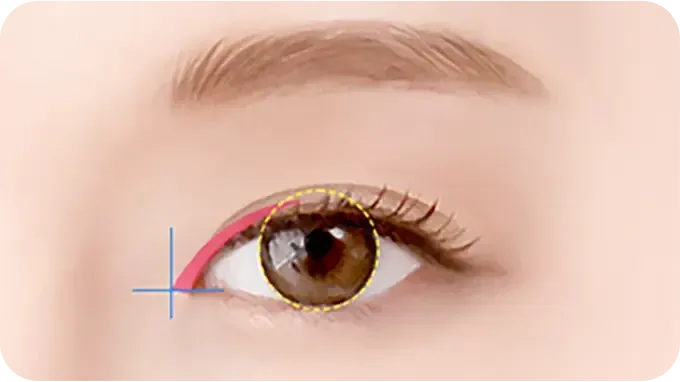
STEP 2. Design
After carefully assessing the eye structure and muscles, the Epicanthoplasty is designed.
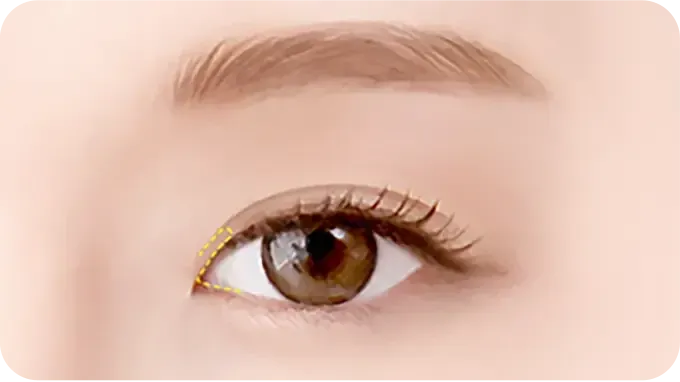
STEP 3. Epicanthal fold incision
The epicanthal fold at the inner eye corner is refined according to its angle and characteristics.
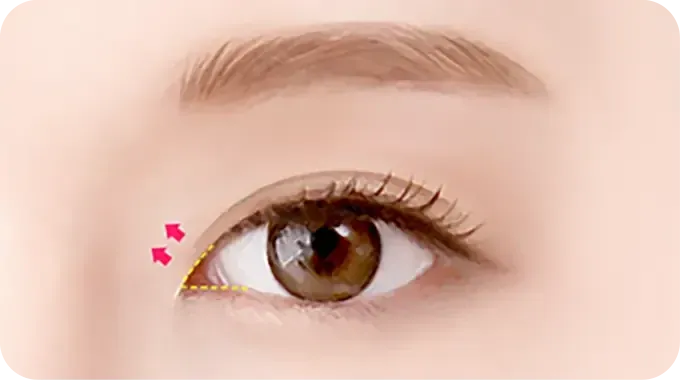
STEP 4. Suturing
To minimize the visibility of the incision line (Scar Revision), suturing is performed internally to create a more open and refined eye shape.
Point 1. One-on-one customized Epicanthoplasty assessment
The proportions of the eyes and the shape of the epicanthal folds are assessed on a one-on-one basis to plan an Epicanthoplasty tailored to the individual.
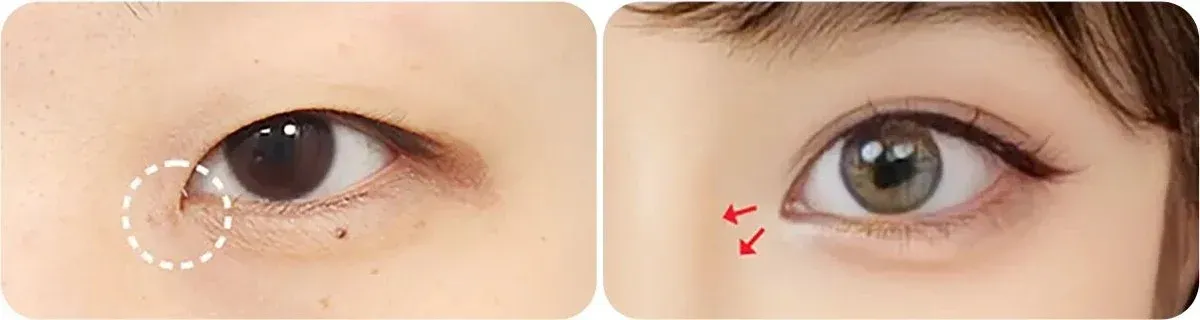
Epicanthoplasty before-and-after photos (left: before surgery · right: after surgery) Before surgery → After surgery
Point 2. Natural results and minimized re-adhesion
By refining the muscles and ligaments that form the epicanthal fold, the closed-off appearance of the inner eye corners is improved. Tissues that can cause re-adhesion are removed to prevent the area from reattaching.
Lateral canthoplasty
Create larger, more open-looking eyes without concerns about re-adhesion. Lateral canthoplasty opens the outer eye corners to improve eye size and shape.
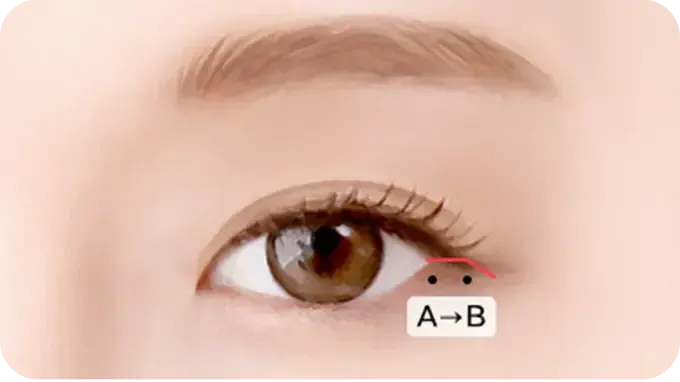
STEP 1. Skin and conjunctival incision
The skin and inner conjunctiva at the eye corner are incised.
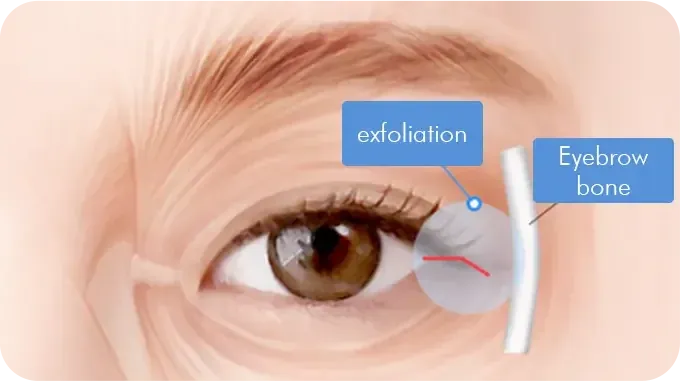
STEP 2. Orbicularis oculi muscle dissection
To prevent recurrence, the orbicularis oculi muscle is dissected.
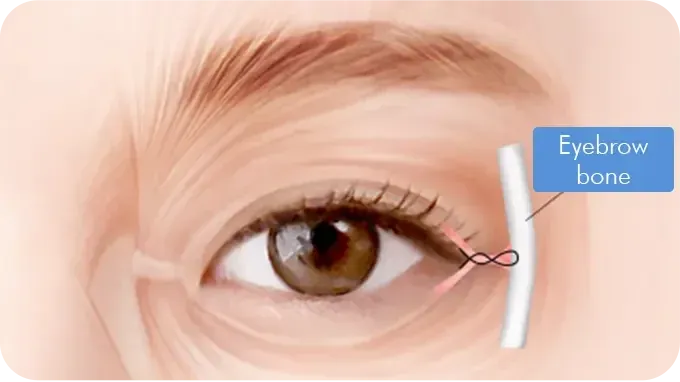
STEP 3. Periosteal fixation
The dissected orbicularis oculi muscle is firmly secured to the periosteum. Limitations may apply depending on the individual's skin condition.
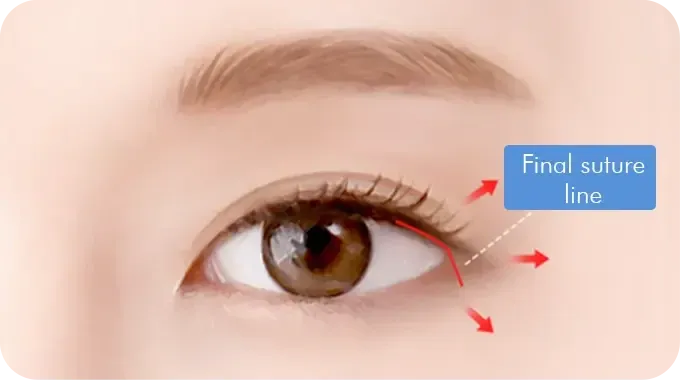
STEP 4. Suturing
The incision site is carefully sutured.
Point 1. Enhanced durability through firm periosteal fixation
To reduce the risk of recurrence, the dissected orbicularis oculi muscle is firmly secured to the periosteum, improving the longevity of Lateral canthoplasty.
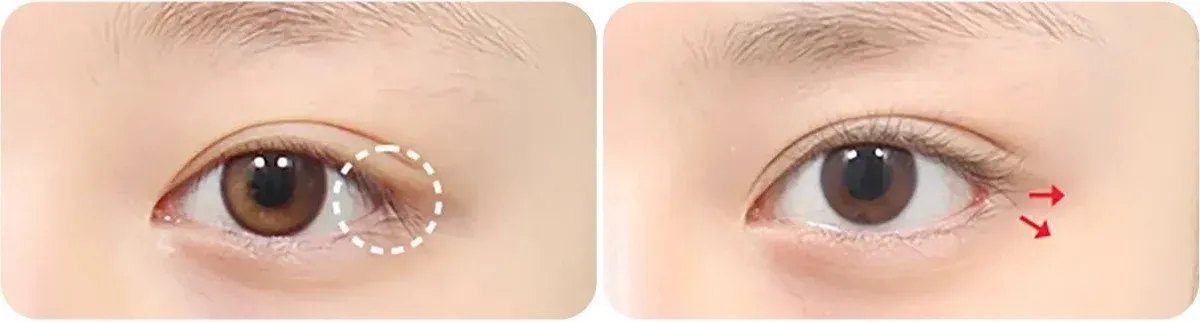
Lateral canthoplasty before-and-after photos (left: before surgery · right: after surgery) Before surgery → After surgery
Point 2. Lateral canthoplasty with enhanced longevity and fewer side effects
· Firm fixation to the periosteum helps prevent recurrence. · Preserving the outer eye area helps prevent the eye corner from reattaching.
Lower Canthoplasty
Makes the eyes appear longer and creates a softer impression. Lower Canthoplasty lowers the eye corners through the conjunctiva to create a softer eye shape.
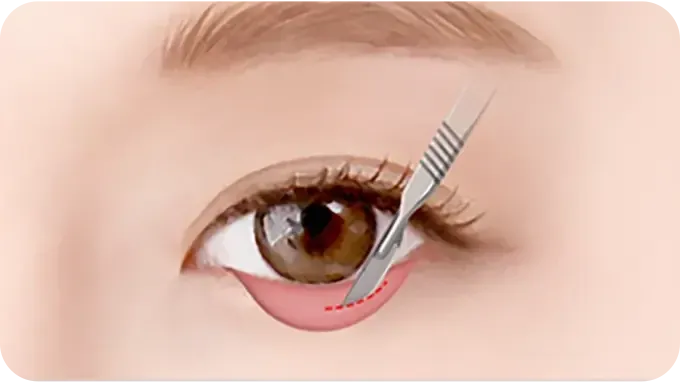
STEP 1. Conjunctival incision
The inner conjunctiva at the eye corner is incised according to the design.
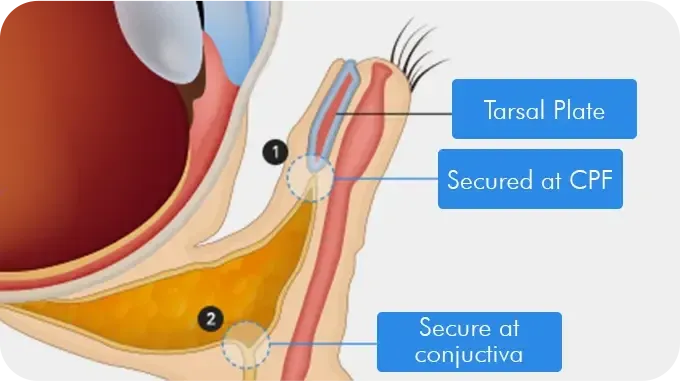
STEP 2. Fix the tarsal plate to the periosteum or CPF
After stretching the inner conjunctiva at a 45-degree angle, the tarsal plate is firmly secured to the periosteum or CPF.
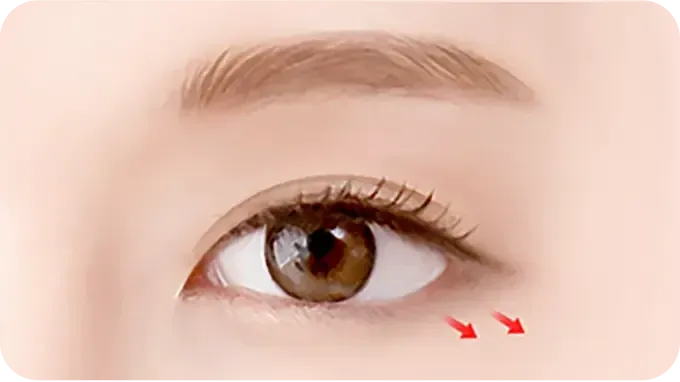
STEP 3. After surgery
No visible suture marks remain.
Point 1. Eye-corner angle adjustment
By firmly securing the eye corner to the inner periosteum, an ideal eye-corner angle, typically between 5 and 10 degrees, is created for a softer and more open impression.
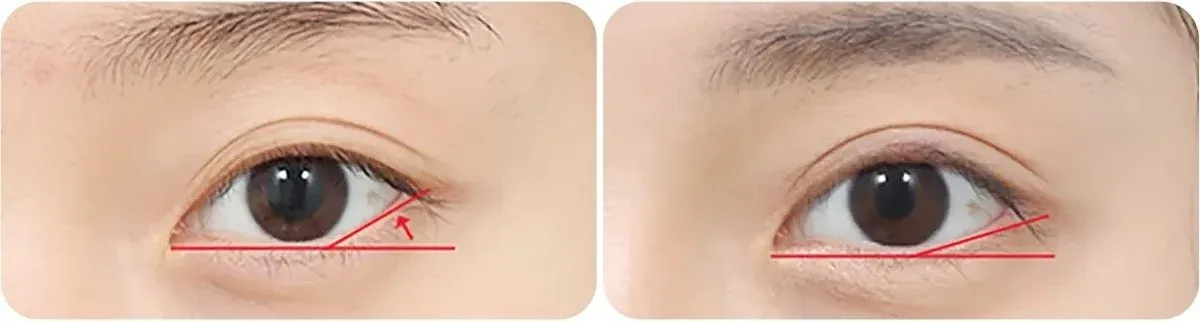
Lower Canthoplasty before-and-after photos (left: before surgery · right: after surgery) Before surgery → After surgery
Point 2. Lower Canthoplasty without concerns about stitch removal or scars
· There are no sutures on the skin surface, so stitch removal is not needed. · Because the conjunctiva at the eye corner is incised, no Scar Revision remains.
AB Solution
Expanding the eye area makes the eyes appear larger and longer, creating a naturally enlarged eye shape. We recommend combining two types of Epicanthoplasty to enhance the effect.
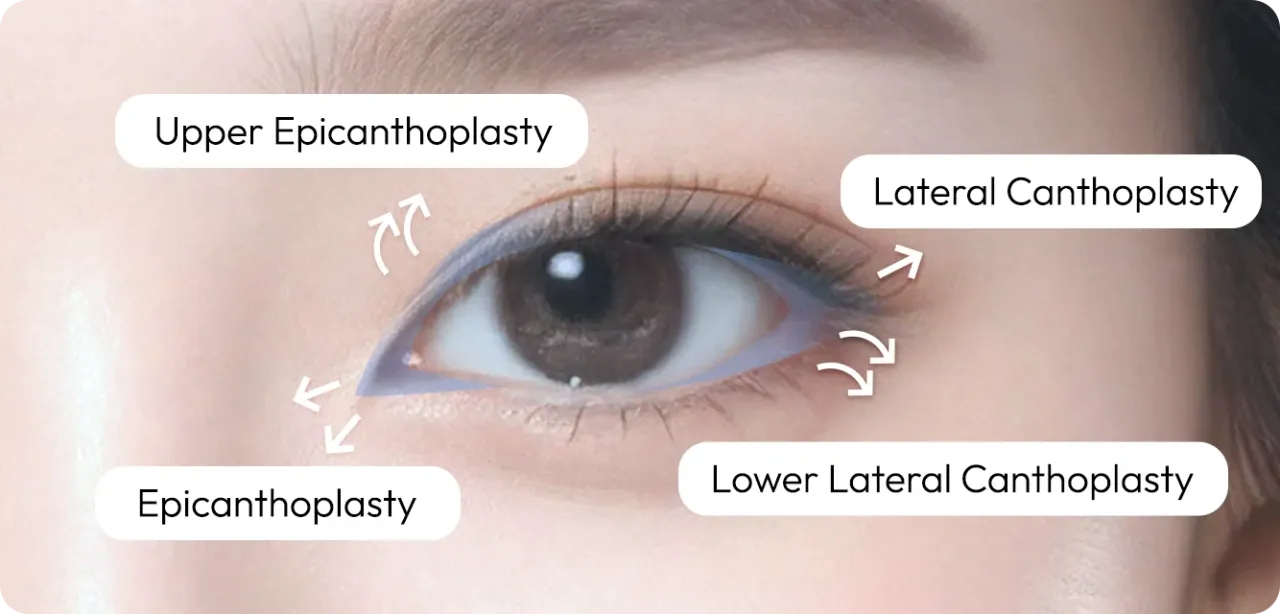
Epicanthoplasty locations: Epicanthoplasty (inner eye corner) · Upper Epicanthoplasty (above the inner eye corner) · Lateral canthoplasty (outer eye corner) · Lower Canthoplasty (lower eye corner)
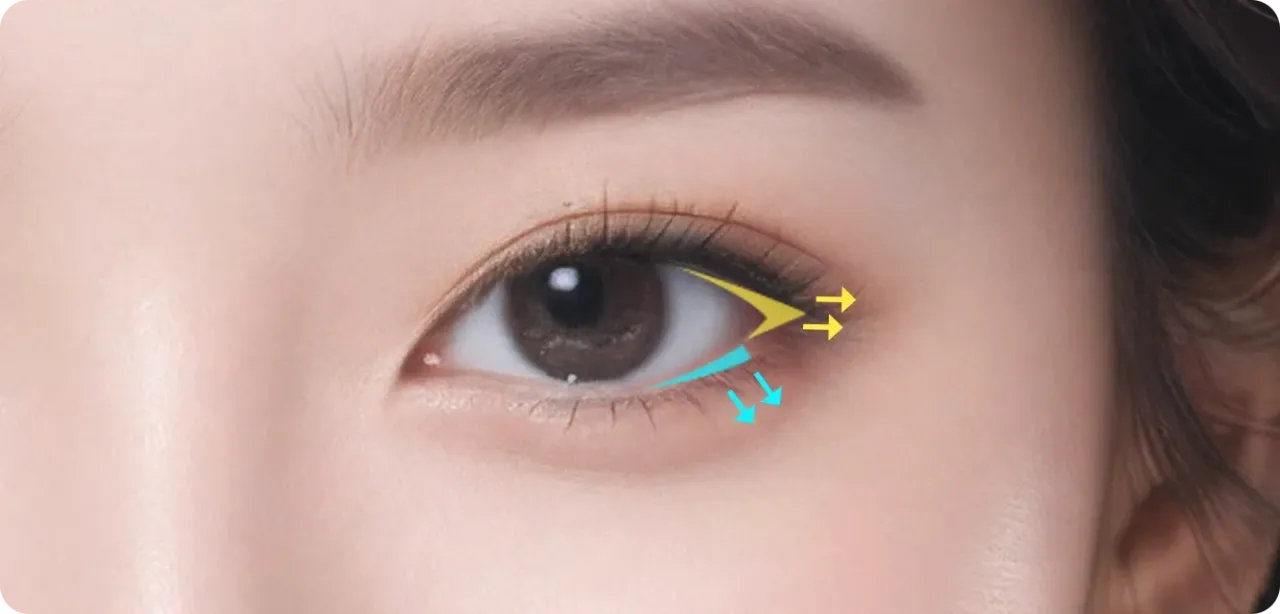
For a gentle impression with eyes that appear wider horizontally and vertically · Lateral canthoplasty + Lower Canthoplasty
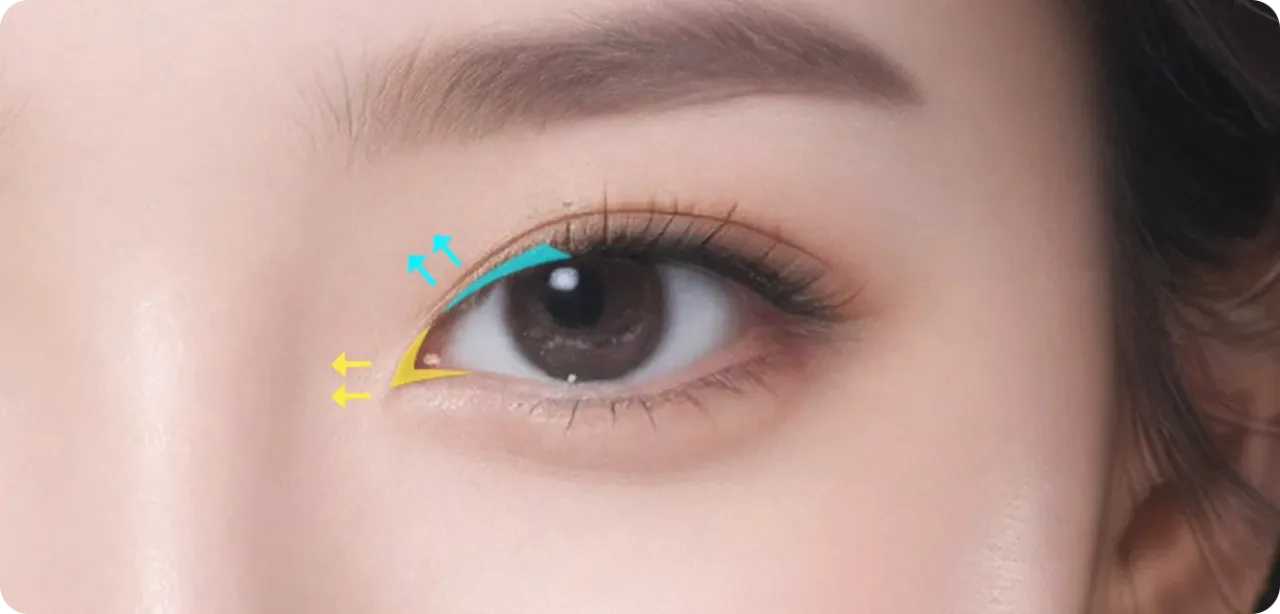
For an open, doll-like impression · Epicanthoplasty + Upper Epicanthoplasty
Strengths of AB Epicanthoplasty Surgery
Point 1. Epicanthoplasty tailored to eye proportions
Taking individual differences into account, including the double-eyelid line, extent of iris exposure, and desired eye shape, closed-off-looking eyes are transformed into a more open and comfortable-looking appearance.
Point 2. Minimized scar visibility
Minimal incisions are made close to the conjunctival line to keep scars inconspicuous.
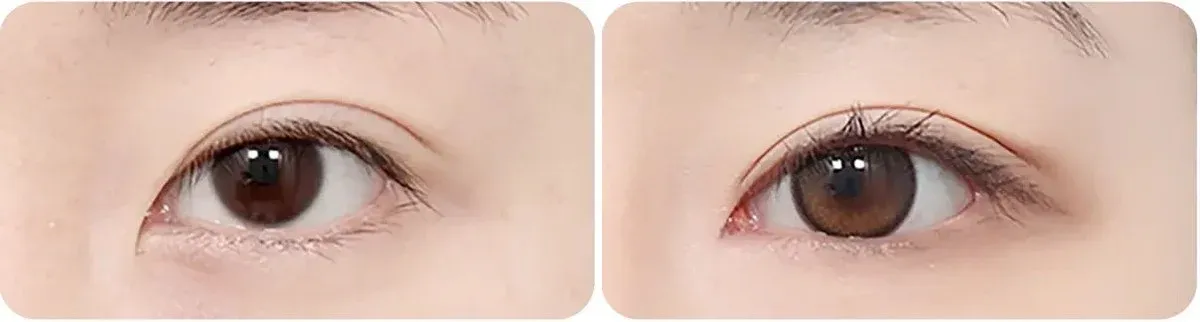
Before-and-after photos (left: before surgery · right: after surgery) Before surgery → After surgery
Point 3. Epicanthoplasty techniques tailored to eye shape
· The skin is repositioned through minimal incisions, making scars less visible. · The eyes are widened by an average of approximately 5–7 mm, and the fixation position is adjusted for natural-looking results. · A closed-off and harsh-looking impression is improved into a softer eye shape. · Creates attractive eyes that appear larger both horizontally and vertically.
Point 4. Less swelling and a faster return to daily activities
· Short procedure time · Minimal bleeding · Less swelling and faster recovery · Naturally enlarged-looking eyes
Surgical Information
| Procedure time: approximately 30 minutes | Anesthesia: local anesthesia or light sedation | Hospitalization: not required | Stitch removal: after 7 days | Follow-up visits: 1–2 times | Recovery period: 3–4 days
Pre- and Post-Operative Precautions
Before Surgery
· Please inform us in advance if you have underlying conditions such as hypertension, diabetes, or thyroid disease; drug allergies; or a history of heart, lung, liver, kidney, or brain-related surgery. An anesthesiology consultation and additional tests may be conducted if necessary. · Please stop taking aspirin, pain relievers, hormonal medications, herbal medicine, and vitamin supplements starting 1 week before surgery. Bring any medications you are currently taking on the day of surgery. · Smoking delays recovery and increases the risk of infection and anesthesia-related complications. Stop smoking from the day you decide to have surgery, and stop drinking alcohol 1 week before surgery. · Do not eat or drink, including water, candy, or gum, for 10 hours before surgery. · Remove all nail polish and gel nails. Do not wear contact lenses or makeup on the day of surgery. Please wear comfortable clothing with front buttons. · Please notify us in advance if you develop a high fever, cough, or cold symptoms within 1 week before surgery, or if your menstrual period coincides with the surgery date. · You cannot drive yourself on the day of surgery.
After Surgery
· Sleeping with your head elevated above your heart for 3–4 days after surgery can help reduce swelling. · Apply cold compresses only through the third day after surgery. Major swelling usually subsides within 1 week, while residual swelling may persist for 1–3 months. · Stitches are removed between 3 and 10 days depending on the condition of the wound. Do not rub or squeeze the eyes forcefully, and do not forcibly remove scabs. · Face washing and light makeup are allowed from the day after stitch removal. Heavy eye makeup and contact lenses are allowed after 3 weeks. Avoid saunas and swimming for 1 month. · Light exercise is allowed after 1 week, while strenuous exercise is allowed after 1 month. · Alcohol and smoking are prohibited for 1 month, as they may cause inflammation and delay recovery. · The final eye shape settles over 3–6 months after surgery.
Please Be Sure to Check
Surgical methods and results may vary depending on the individual’s condition and are determined through consultation with a specialist.
 AB PLASTIC SURGERY